
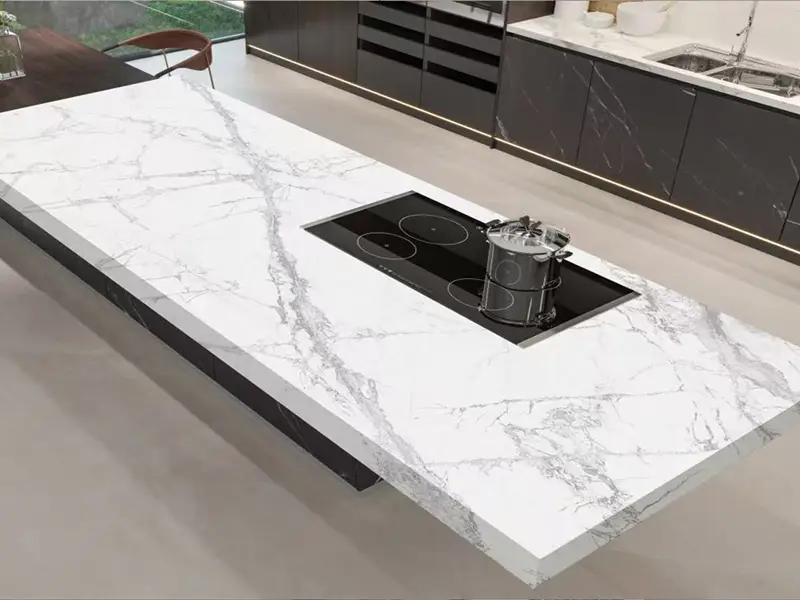
When I first started planning my open-concept kitchen renovation, I kept running into the same frustration. The quartz countertops I looked at felt generic, and natural marble was beautiful but impractical for a family that actually cooks every day. I needed something that could handle hot pans, resist scratches from daily use, and still look sharp enough for the occasional dinner party. That's when I started researching sintered stone — and eventually pulled the trigger on a full island and countertop installation.
This isn't a sponsored post. I'm just sharing what I learned, what worked, and where the process fell short of my expectations.
Why I Ended Up Choosing Sintered Stone
My search started with a simple checklist: heat resistance, stain resistance, and a surface that wouldn't etch from lemon juice or wine. Sintered stone checked all three boxes. It's dense, non-porous, and doesn't require sealing — which was a big deal for me because I didn't want another maintenance chore.
The island was the centerpiece of my renovation. I wanted something that felt seamless and architectural, not pieced together. Sintered stone's ability to be fabricated in large slabs meant fewer seams and a cleaner look. I also liked that it came in a wide range of textures and patterns — everything from marble-look to solid matte finishes.
What pushed me toward a local supplier rather than ordering online was the logistics. Sintered stone is heavy and brittle during transport. I didn't want to deal with the risk of a cracked slab arriving at my door with no recourse. So I looked for a company with regional warehousing and a track record of installation.
What the Installation Process Actually Looked Like
I went with a company based in Northeast China that serves the region through a local warehouse — Jilin Shunda Stone. They're a distributor for several major sintered stone brands, including Delfone, Italy's KIMS, and Xinyansu. What mattered to me wasn't the brand name on the slab; it was whether the crew doing the fabrication and installation knew what they were doing.
Here's what stood out during the process:
Pre-installation checks
Before anything was cut, the team did a full walkthrough of my kitchen. They checked the wall and floor for levelness, measured for square, and flagged a low spot near the sink area that needed to be addressed first. They used infrared scanning and chalk lines to establish reference points. The tolerance they aimed for was a 3mm deviation across the square — which, frankly, I didn't fully appreciate until I saw how tight the seams turned out.
They also inspected every slab before bringing it inside. They checked for warping, size deviations, and hairline cracks. One slab had a subtle color variation that didn't match the others, so they swapped it out before fabrication. That saved a lot of headache later.
Dust control
This was the part I was dreading most. Cutting stone indoors usually means a fine layer of dust settling on everything you own. But the crew used a wet-cutting system with an integrated vacuum — a specialized saw that captures dust at the source. They also ran a large industrial vacuum and ventilation tube to keep the air clear. I stayed in the next room for most of the cutting, and honestly, I barely noticed any dust afterward. The floors weren't gritty, and my cabinets didn't need wiping down.
Protection and organization
They laid down protective mats for their tools and kept everything organized. The entry door got a padded cover to prevent scratches. All the electrical outlets were capped with custom dust guards so no slurry could get into the wiring. The crew wore branded uniforms, hats, and gloves — which sounds like a small thing, but it signaled that they ran a tight operation.
Fabrication and fitting
The slabs were pre-fitted before final installation. They laid everything out dry first to check for pattern alignment, color consistency, and seam placement. They used specialized clips and leveling tools to keep the surface flat and the seams tight. The adhesive they used was color-matched to the stone, so the joints practically disappear.
After installation, they cleaned up everything, hauled away the waste, and took photos of the finished work for their records. I did my own walkthrough and found no chips, no uneven edges, and no visible seams unless you get right up close.
What I Liked — and What I Didn't
The good
The surface has held up exactly as advertised. I've put hot cast iron skillets directly on it without a trivet. I've spilled red wine and olive oil and watched it bead up instead of soaking in. Cleaning is a quick wipe with a damp cloth — no special products, no sealing, no fuss.
The installation quality exceeded my expectations. The seams are tight, the edges are clean, and the island feels like a single piece of stone rather than a fabricated assembly. The crew was professional, punctual, and left the site cleaner than they found it.
Price-wise, I paid about 20% less than what I was quoted for comparable quartz from a big-box retailer. Part of that is because this company operates as both a wholesaler and a retailer, so there's no middleman markup. They also had the slabs in stock locally, so I didn't wait weeks for shipping.
The not-so-good
Sintered stone is heavy. Really heavy. If you're planning a large island, you need to make sure your cabinetry and floor can support the weight. I had to reinforce the base of my island — something I didn't anticipate until the fabricator brought it up during the measurement visit.
The material is also brittle at the edges. It doesn't chip easily once installed, but during fabrication and transport, it's vulnerable. I was nervous watching them move the slabs into my kitchen. They handled it fine, but it's not a DIY-friendly material.
Finally, the lead time for custom cuts was longer than I expected — about two weeks from template to installation. If you're on a tight renovation schedule, factor that in.
A Few Things to Check Before You Commit
If you're considering sintered stone for your own project, here's what I'd verify before signing anything:
Your substrate needs to be solid. The walls and floors should be level within 3mm, with no hollow spots larger than 20cm by 20cm. Any waterproofing or crack repairs need to be done before installation. If the substrate fails, the stone will too.
Check the slabs in person. Verify the size, pattern, and color against your order. Look for chips, hairline cracks, or shade variations. Once it's cut and installed, it's yours.
Control the environment. Installation should happen when the temperature is between 5°C and 35°C, with humidity under 75%. Too much airflow during curing can affect the adhesive bond.
Ask about the crew, not just the brand. The best slab in the world will look terrible if it's poorly installed. Ask how long the installers have been with the company, whether they use dust extraction, and how they handle seams and edge profiles.
Would I Do It Again?
Yes. The finished island is exactly what I wanted — clean, durable, and low-maintenance. The installation process was smoother than I expected, and the price was better than the alternatives I priced out.
That said, it's not a decision to make lightly. Sintered stone requires careful planning, a competent fabricator, and a substrate that's ready for it. If you go in with realistic expectations and a supplier who knows what they're doing, it's a solid choice for a high-use kitchen.